
I have 2 purposes for this canvas:
1) A Housewarming Gift
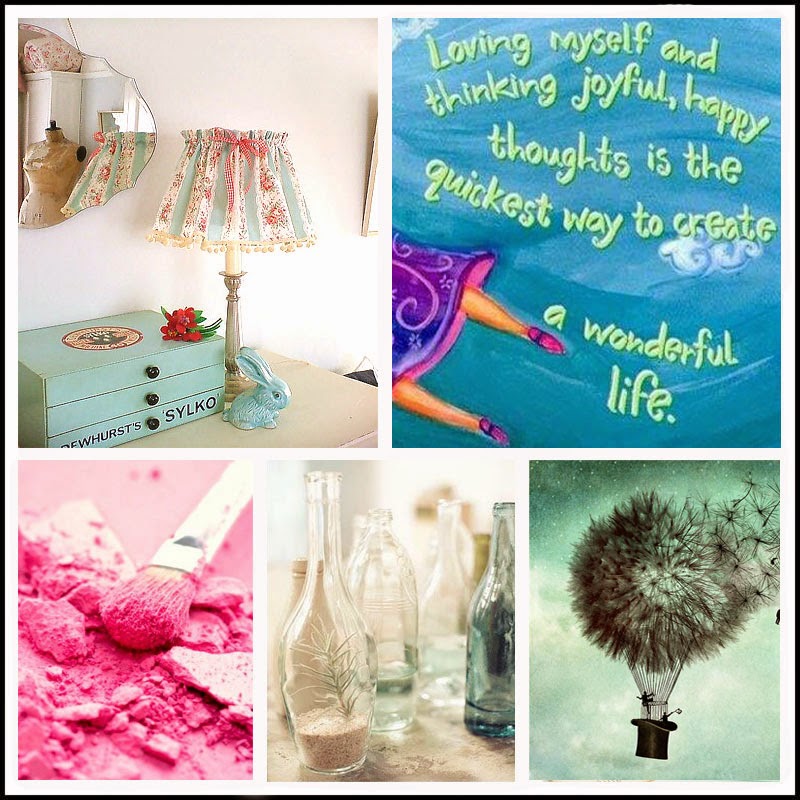
2) I'm playing along with Scrap Around The World challenge this month as the pretty colors on this canvas was inspired by the July mood board. Click on the mood board to know more about this challenge.
So enough talk and here's the canvas with lots of texture!

For those who would like to know how I create the background effect; read on...I will try to be brief and do pardon me on some of the bad photo quality as it was not my initial intention to do a step by step tutorial on this canvas.
Ready???....
Step 1: Mist the canvas with your favourite colors randomly. You can choose to have as many colors as you want but I not recommend to go more than 3 colors. For me, I go for my usual favourite green and pink :) Now turn your focus on the top left hand of the picture, you will notice a 3rd color is formed when pink and green overlaps. This is why I do not recommend too many colors.
As for the dripping or or flowing effect, all you need to do is mist/spray generously and while it is still wet, tilt the canvas to any direction that you would like to see the flow go towards...usually you will want it to flow downwards.
**Always ensure you have a primed canvas before you start working on it. Otherwise do apply a layer of gesso before starting on your piece.

Step 2: Add on the wordings around the canvas. I wanted a soft and subtle effect around the canvas, thus instead of misting or inking over the stencil, I cleaned off the colors....yes you wash off the colors. As the wordings were quite detailed, I used wet cotton buds to do the job. For bigger areas, normal cotton pads or balls will do. You may ask if you can use a cloth or tissue for the clean off, I would prefer cotton as they are gentle on the canvas and the water does not dry off too fast. The wordings came from Plaid - Happy Words Peel and Stick Stencils.
*note that this clean off method will only work on water soluble mediums...
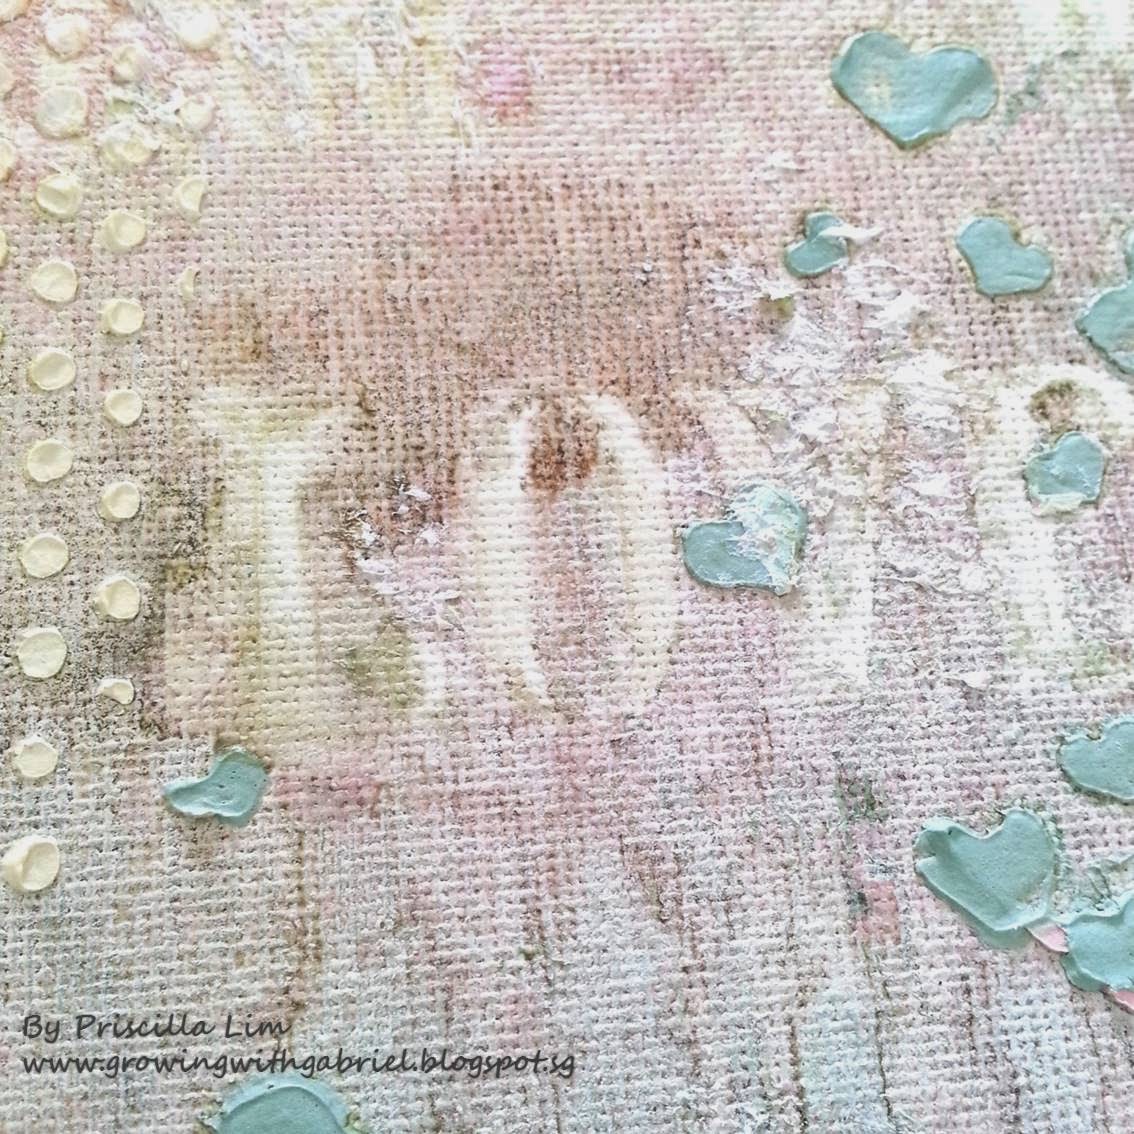
Step 3: It's fun time with texture paste!! Most of us know that texture paste comes in white but do you know that you can add acrylic paint to texture paste and have them in a spectrum of colors? On this canvas, the polka dots were applied with yellow texture paste and the star burst in the middle with pink texture paste.
It doesn't matter what brands you go for but for me, I like Kaisercraft Acrylic Paint cause they come in the most delicious pastel colors! Doesn't the pink paste below reminds you of strawberry cream or icing? ;)
Before I forget, Memory Box and Crafters Workshop stencils were used here.
**Note that texture paste behaves differently from white paint, it will not alter the color of the any paint you are mixing into the paste.

Step 4: Create more texture with Heidi Swapp hearts stencils. Again my texture paste here is mixed with green paint.

Step 5: To complete the grunge look, I have created burlap effects on both sides with Tim Holtz Burlap stencils and brown paint. For this burlap effect, I do not need it to pop, thus it is just purely brown paint. I did not use texture paste on this burlap effect.

For the base color of this butterfly, I have mixed Heidi Swapp Color Shine in pink with white acrylic paint. When the base color has dried, I sprayed on additional layer of Tattered Angels Turquoise Blue Glimmer Mist.
To finish off, stamp on the script writing using Stampers Anonymous stamp with Staz On Ink pad in Stone Grey.

Step 7: Use Ranger Distress Paint to alter the look of the wood letters to white.
*Apologize that this picture is not very clear.

Step 7: Decorate the butterfly with tulle, flowers, leaves and wood letter.

Step 8: Last step! Glue on the centre piece!

Wala done! Hope you enjoy this tutorial and do feel free to comment :)
9 comments:
Beautiful canvas! I just love those colours! And thank you for the wonderful tutorial!
Thank you for joining at SATW!
So happy to see your working process! Thank you for sharing it, and thank you for palying with us at SATW! Perfect creation <3
Thank you Karita and Terhi for the kind words.
You gals are awesome for holding successful challenges and allowing scrappers around the world to come together :)
great texture and thank for your step to step!
Such a GORGEOUS canvas.... Thank you for playing along over @ SATW this month....
Amazing work with all media!!! I love the background - to many details!!! And the whole canvas is beautiful! Thank you for playing along with us at SATW this month.
@nanou49 You are very welcome. Glad you enjoyed the tutorial.
@Rachael Funnell Thank you for the sweet compliment.
@Tusia Lech Thank you. Hope to play along with more SATW challenges :)
What a gorgeous gift! Love your masking with the moulding paste and awesome job with the mist! All the best from SATW! :)
Thanks langeatheart!
Post a Comment